Hi Audrey here once again with another journal. I hope you all had a Wonderful Christmas, if you Celebrate it.
This one is made from scratch, using mostly 49 and Market’s ARToptions Plum Grove Collection. The cover is from an old book, the book measured approximately 21cm long but I cut the width to 11cm which is slightly wider than the largest of the bookplates in the Curators Essential - Bookplates, folded.
The signatures inside, there’s five in this journal, but once it was finished I think three would have been enough as by the time I’d decorated the inside it was chock'o'block. They are made with a combination of beautiful 6x8 Plum Grove papers, Curators Essential - Bookplates, ARToptions Plum Grove - File Essentials, ARToptions Plum Grove - Ephemera Bits, blank pages and even large paper doilies. (There are some very good tutorials on YouTube on how to make journals, covers and inside signatures). Once I’d made the inside pages, I sewed the signatures to the spine of the book, covered the stiches on the spine of the book with Curators Essential Fabric Tape Set - All Black. I used extra glue for longevity. The inside covers are lined with ARToptions Plum Grove - Flourish paper from the 12x12 Collection Pack.
I then went through the journal page by page and added laser cuts and elements along with lots and lots of rub-ons and washi tape. I used a variety of Rub on transfers from the huge collection of transfers in 49 and Markets range throughout this Journal. Including the ARToption Plum grove 8x6 and 12x12 Rub-Ons, along with the NEW Essential Textblends Rub-On Transfers These really made the extra plain paper I added for journaling so much prettier. I've cut some pages to fit and ripped others.
The journal was made with the style of a junk journal in mind.
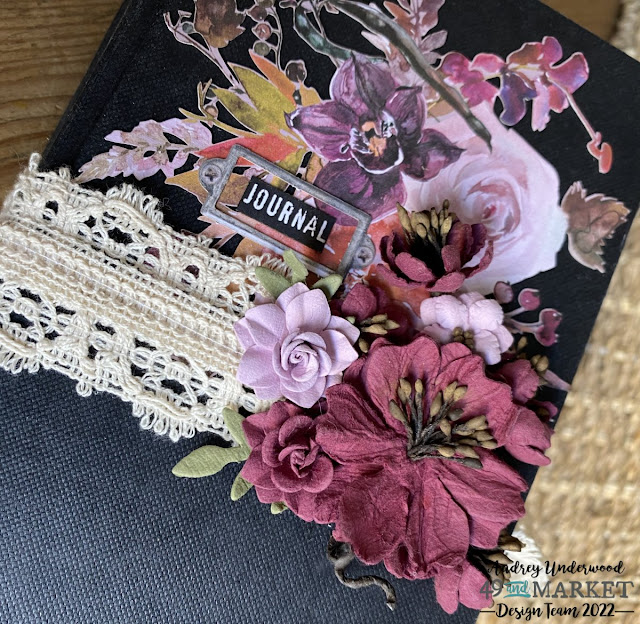
I added a large eyelet to the front and back cover so I could thread some Lacey Trim through them as my closure. I used two strips of medium thickness trim, in cream and the thinner one in the pack and sewed them together down the centre to make the strip of lace. I glued a large ARToptions Plum Grove laser cut to the front, a tiny book plate also from the laser cuts and the word 'journal' to the top, front of the journal.
I glued a collection of beautiful Wildflowers Paper Flowers - in Plum and the Florets Paper Flowers - in Soft Lilac to the lace, making sure the lace could still move through the back eyelet if the journal needed more width.
Here's a little run through video of the journal.
You can see a run through video HERE on the 49 and Market YouTube Channel.
You can also find this journal (soon) and more for sale on my Etsy Shop The Bowerbird's Loft
49 and Market Products Used: ⮙ ARToptions Plum Grove - File Essentials ⮙
 ⮙ Curators Essential - Bookplates ⮙
 ⮙ ARToptions Plum Grove 6x8 Collection Paper Pack ⮙
 ⮙ ARToptions Plum Grove 12x12 Collection Paper Pack ⮙
 ⮙ I used this one from the pack ARToptions Plum Grove - Flourish ⮙
 ⮙ ARToptions Plum Grove - Ephemera Bits ⮙
 ⮙ ARToptions Plum Grove - Laser Cut Wildflowers ⮙


⮙ Ticket Essentials ⮙
Until Next Time
Have a Safe and Happy New Year
Audrey x


 ⮙ ARToptions Plum Grove - File Essentials ⮙
 ⮙ Curators Essential - Bookplates ⮙
 ⮙ ARToptions Plum Grove 6x8 Collection Paper Pack ⮙
 ⮙ ARToptions Plum Grove 12x12 Collection Paper Pack ⮙
 ⮙ I used this one from the pack ARToptions Plum Grove - Flourish ⮙
 ⮙ ARToptions Plum Grove - Ephemera Bits ⮙
 ⮙ ARToptions Plum Grove - Laser Cut Wildflowers ⮙


