Hi Audrey here once again. I'd like to share another super special journal with you. The name came from the fact that throughout the journal are pages from a 'Little Women' novel. The book was gifted to my husbands mum in 1947. Now normally I wouldn't use pages from a book with such sentimental value, BUT,,,,, I actually rescued these pages from the jaws of a vicious beast {not really}, but the book was damaged and unfortunately partially chewed by one of our foster puppies. I managed to save some pages and now they have a forever home inside this beautiful journal made in their honour.
My shabby chic slightly distressed style has had it's cup filled lately, with one of the newest collections from 49 and Market, I've absolutely fallen in love with Vintage Artistry Tranquility and when I seen the Vintage Artistry Tranquility - 12x12 Rub on Transfer Sheet, oh my lordy!! I actually scoured the house for something I could alter and even truly thought about rubbing a transfer on each of the doors of my white distressed dresser. Instead out came the white chalk paint and an old book cover to alter instead. {don't worry the dresser could still be in my sights}.

To start I chalk painted cover, inside and out, about three coats {depending on the paint}on the outside and just the edge of the inside as I was lining the cover. Allow to dry thoroughly. I lined the inside cover with a paper from Vintage Artistry Tranquility 6x8 Collection Paper Pack. Then glued the largest of the pockets from the Vintage Artistry Tranquility - File Essentials on each cover. I did have to trim these down ever so slightly to fit.
On the inside along the spine, apply a couple of strips of Vintage Artistry Tranquility - Washi Assortment Set. This not only looks good but will give the spine more stability. I then made three signatures with a combination of papers cut to size from the Vintage Artistry Tranquility 12x12 Collection Paper Pack and plainer papers like - printer paper and paper doilies dyed with coffee. The same paper and other plain papers embossed on a dye cutting machine. (There are some very good tutorials on YouTube on how to make journals, covers and inside signatures). Once the signatures were sewn in I used a ruler to roughly rip the edges of all the papers.

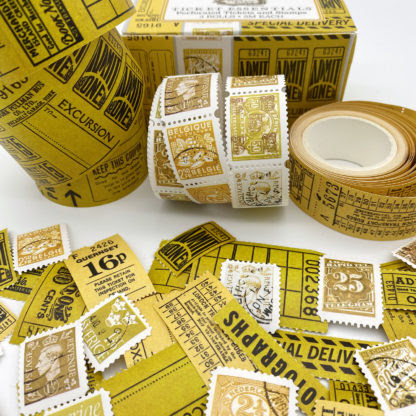
I then went through the journal page by page and added envelope pockets, ready made with the Vintage Artistry Tranquility - File Essentials, very handy pockets to tuck extra pages from the novel, Vintage Artistry Tranquility - Ephemera Bits, the Ticket Essentials help to add extra tuckable ephemera here and there, along with the Vintage Bits Essential Filmstrips for an extra bit of pizzas' to a page and little pads of paper I made from the excess paper from making pages for the journal. I also used this excess paper to make tags to tuck into pockets along the way in the journal.
For the plainer pages I added lots and lots of rub on transfers from various packs of the latest release of transfers, lots of stickers from, Vintage Artistry Tranquility - Washi Sticker Roll and Vintage Bits Lace Washi Set - Hickory. The fussy cut pages from both the 12x12 collections and the 6x8 and the Vintage Artistry Tranquility - Ephemera Bits made perfect decorative pieces for tags and pages etc.
Once I finished the inside I applied the beautiful Vintage Artistry Tranquility - 12x12 Rub on Transfer to the front of the journal, sanded the edges and applied more Washi to the spine to cover the stitching. I sealed the covers of the journal with mat varnish to protect it.
To finish I added Vintage Artistry Essentials - Shaped Clips, word clips and Dark Greige, Curators Essential - Metal Index Clip - Aged Silver and I machine sewed satin bias binding to the largest strip of lace from the Lacey Trim, in white, to make a tie for the journal, made a separate bow, embellished with beautiful bling buckles, then sewn to the main tie.