Sunday, March 20, 2022

Fairy Journal Page

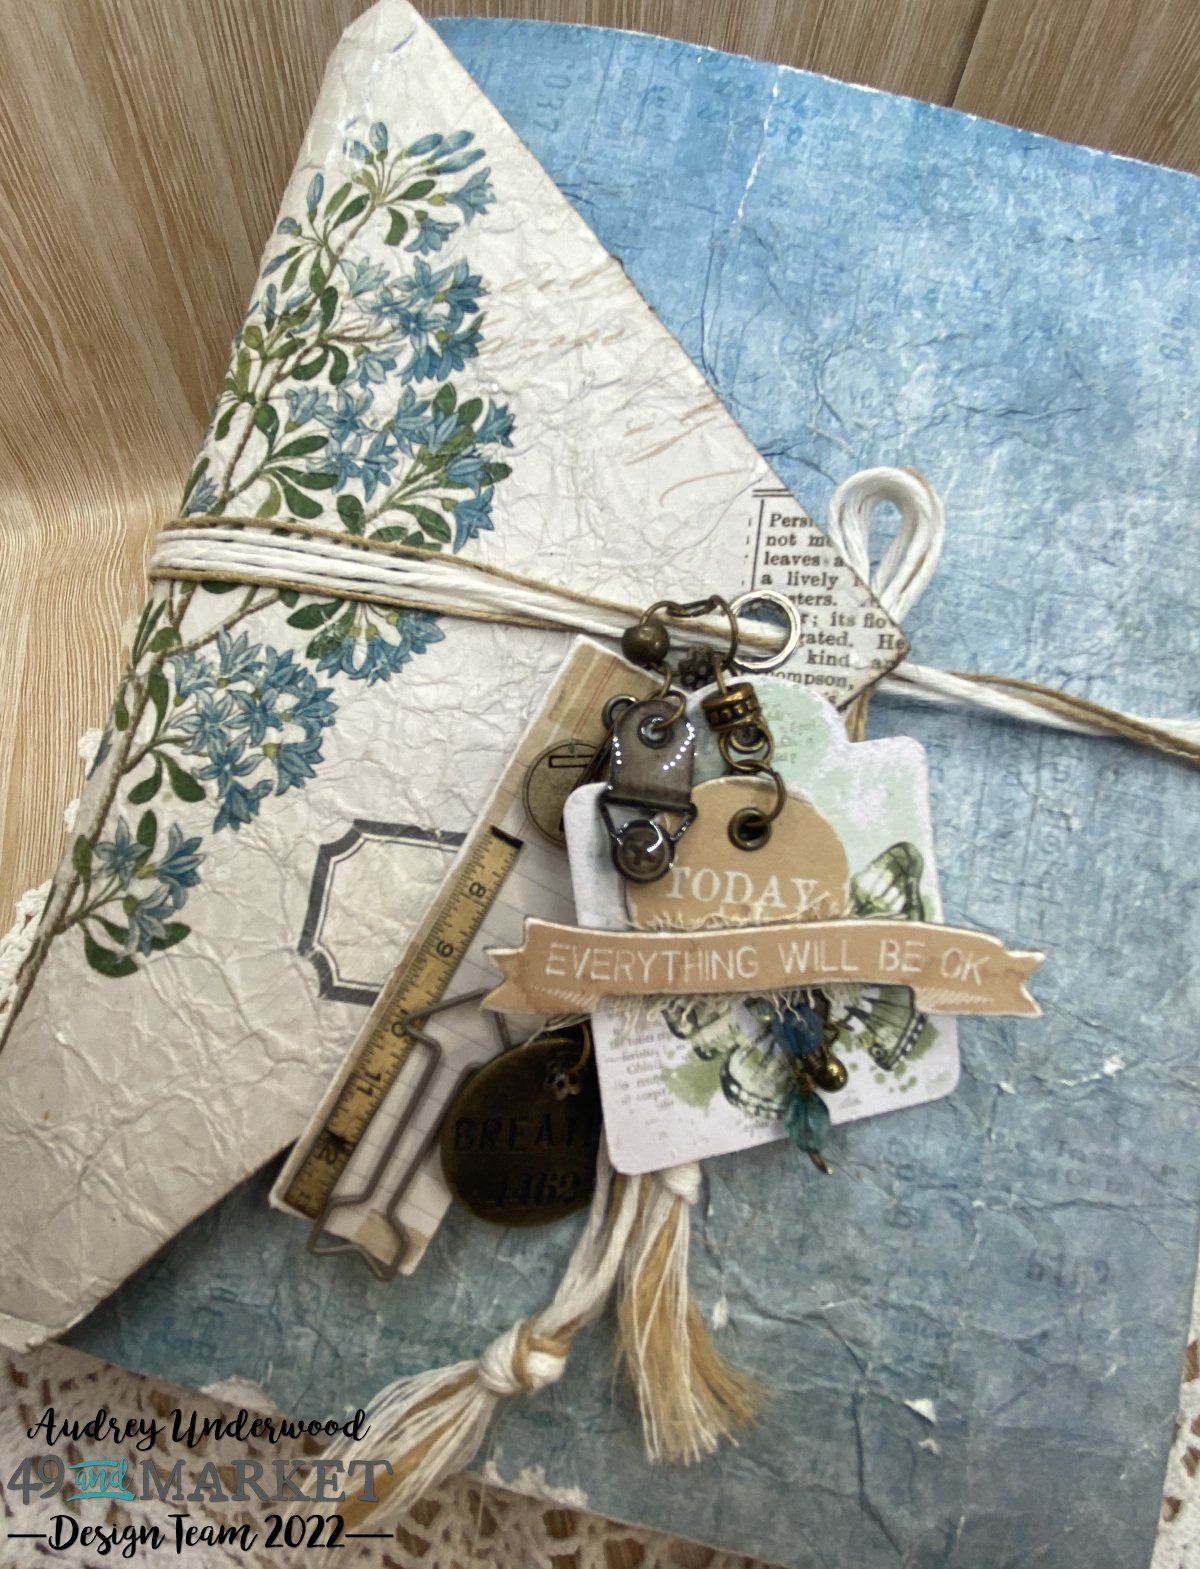
Hi there, today I share a page I created in one of my recent journals. I knew I had to add wings to these images and found lots I could use in all of the Curators Botanical products. Actually between paper, embellishments and rub-on transfers, there's tonnes of wings throughout the 49 and Market range you can use in this way. See if you can spot the wings I used in the product list below.
The base page is from the Curators Botanical - 6x8 Collection Paper Pack, with the edges inked in a brown colour. I added washi tape from Curators Essential - Washi Tape Stitch Set  to the centre of. I love how I can cheat sew strips of machine sewing with this washi... I've already used one whole roll of a particular design in the green colour.(lol)Luckily there is two rolls of it in the box!! I then positioned strips of the Curators Botanical Postage Stamp Washi on both sides. This comes with perforated edges after each stamp so they tear off easily or you can do as I've done and roughly rip a strip off and position it where you please. 
I positioned the beautiful fine floral laser cut element on the right hand side page and then cut a section of rub-on transfer from the Curators Botanical - 6x8 Rub-on Transfer Set and placed it over the top of the laser cut and across the bottom of the page, extending across the left page. Then I rubbed it in place. On the left page I mounted a tag from Curators Botanical - Laser Cut Elements with some Rub-on's on it from the Rub-on pack and some muslin behind it. I fussy cut what wings I need to and attached them to the back of the girl images. then mounted them in place. I chose another floral laser cut element for the left hand page and tucked it in front and behind the fairy seated on the tag. To finish off I added the quote using alpha stickers.   


Until Next Time
Happy Creating
Audrey x 

Friday, March 4, 2022

Travel Journal - Inside pages

Hi there Audrey here with the inside of the journal I shared the cover of a couple of weeks ago. It's been made using the Foundations Envelope Gatefold Flip Folio. As I said last time I wanted to make the outside look well loved and worn. Inside I've tucked lots and  of pages to journal on, with space to write, add more ephemera, photos and whatever I wish.

To make extra pages I used the Curators Botanical - 6x8 Collection Paper Pack, {they're a perfect size for this folio}, either by sticking them to other pages or using the additional spine hinges that are included in the packs, {these made it so much easier to add pages}. 
Also included are the neodymium magnets. I used a couple, one to close the gatefold page in the centre of the journal & some more for hidden journaling spots. 
I added pockets to hold ephemera of all sorts along with photos and whatever else I can think of while using it.
Using the Curators Botanical Ephemera Bits, along with lots from Curators Botanical Laser Cut elements, it made it so much easier for extra journaling spots and decoration.
The Curators Botanical Tag Set is ideal for decorating and extra journaling spots. A lot of these were held in place using Vintage Artistry Essentials - Shaped Clips &
AND can I just mention the brand spanking NEW 12x12 rub on transfers!!!! Omgollygosh!!! You have to check them out, hot off the press! And available in Curators Botanical and Artoptions Avesta Collections. I used these and Curators Botanical 6x8 Rub on Transfer Set throughout the journal to finish off and add extra 'wow' factor to the journal.

***Feel free to check out the added video below to see how it all came together.

⮛ Just a little run through video. 
You can see a better quality one on the 49 and Market YouTube channel HERE

49 and Market Products Used Foundations Envelope Gatefold Flip Folio  ⮙⮙ Curators Botanical - 12x12 Collection Paper Pack ⮙ Curators Botanical - 12x12 Solids Collection Paper Pack ⮙⮙ Curators Botanical - 6x8 Collection Paper Pack ⮙ Curators Botanical Garden Clippings Paper  Curators Botanical - Tag Set  Artoptions Avesta - Tag Set ⮙

⮙ ARToptions Avesta - Chipboard Set ⮙ Curators Botanical Postage Stamp Washi Tape  Curators Botanical - Laser Cut Elements 

 Curators Botanical - Ephemera Bits 

 Curators Botanical - Tag Set  Curators Botanical - 12x12 Rub on Transfer Sheet  Curators Botanical 6x8 Rub on Transfer Set  Curators Essential - Laser Cut Elements  Curators Essential - Washi Tape Stitched Set  Curators Essential - 4" Washi Roll Botanical  Curators Essential - 4" Washi Tape Roll - Adverts  Artoptions Avesta - Fabric Tape Assortment 

Vintage Artistry In the Leaves - Washi Tape

Vintage Artistry Essentials - Binder Clips - Antique Bronze

Vintage Artistry Essentials - Word Clips - Dark Greige

Vintage Artistry Essentials - Hardware - Epoxies

Jute Cording - Single Ply

Until Next Time

Happy Creating

Audrey x

Thursday, March 3, 2022

Journal Cover and Tags

Hi back again with another journal, well, a journal cover. I might be a little obsessed with this type of thing at the moment!! I've always been into journals, it goes way back and I love to make them myself rather than purchase a ready made one, whether from scratch or from old books.
When I first seen the Foundations Envelope Gatefold Flip Folio I instantly knew what I wanted to do with it and here it is. 
I tried to make it look like an old well worn, well loved journal.
The folio, like similar ones in the range is an interactive folio that can be constructed in lots of different ways and orientations, with lots of room to add more inside, whether lumpy bumpy stuff, photos or lots more pages. Once the folio is scored and closed it measures - 6.25 x 8.25 x .5″
I started by scrunching the blue piece of paper from Curators Botanical - 12x12 Solids Collection Paper Pack  & the Curators Botanical Garden Clippings Paper I scrunched and scrunched this pieces many times to soften them and add lots of creases to the papers. I used pva glue all over the front and partly over the back of the journal and stuck the papers in place, pressing them as smooth as possible with the creases in the papers. Then trimmed off the edges. I lightly sanded some edges and across the top of the folio ever so slightly in places to bring out the creases. I lightly inked the edges of the triangular closing flap and once the glue was dry positioned an eyelet in the centre of the flap and set in place for my front tie piece to go through to hold the journal closed. I used two long lengths of jute and three lengths of white string for this. I grouped them together and tied a tight knot on each end then using a pin I separated all the lengths to form tassels and trimmed the ends even.
I attached the tags using jump rings to the string so that they could move along the strings easily.
I chose a chipboard circle from the ARToptions Avesta - Chipboard Set with the word 'Today' on it, punched a hole it and attached an eyelet to the centre top. I then glued a chipboard banner with some more words on it from the set with some muslin behind for texture. I took two of the Vintage Artistry Essentials - Hardware - Epoxies and stuck them back to back to form a charm.
I then added chain, beads and charms for more decoration along with a Vintage Artistry Essentials - Shaped Clips Dark Greige (the arrow)and a chipboard number to finish off.
Stay tuned next time for the inside pages


Until Next Time
Happy Creating 
Audrey x